Driver Setup
By default, the Retina system is configured as a DHCP client. To find the configured IP address, access your DHCP server or use the dedicated finder application. The driver can also have a static IP configured. The Retina system needs at least one main unit to function, which can be expanded with an unlimited number of additional units. Each unit supports between 1 and 12 detector channel modules, and the system can be easily scaled by adding more modules into available slots and configuring them through the software.
Each driver communicates with other drivers through dedicated ports. Since the main unit provides the core computational power, additional units must be connected to it. Clock synchronization for precise time processing is managed via a dedicated port, while the rest of information is exchanged between the units via 9-pin connectors. Readout of the system temperature is provided via cryostat multi-pin connector.
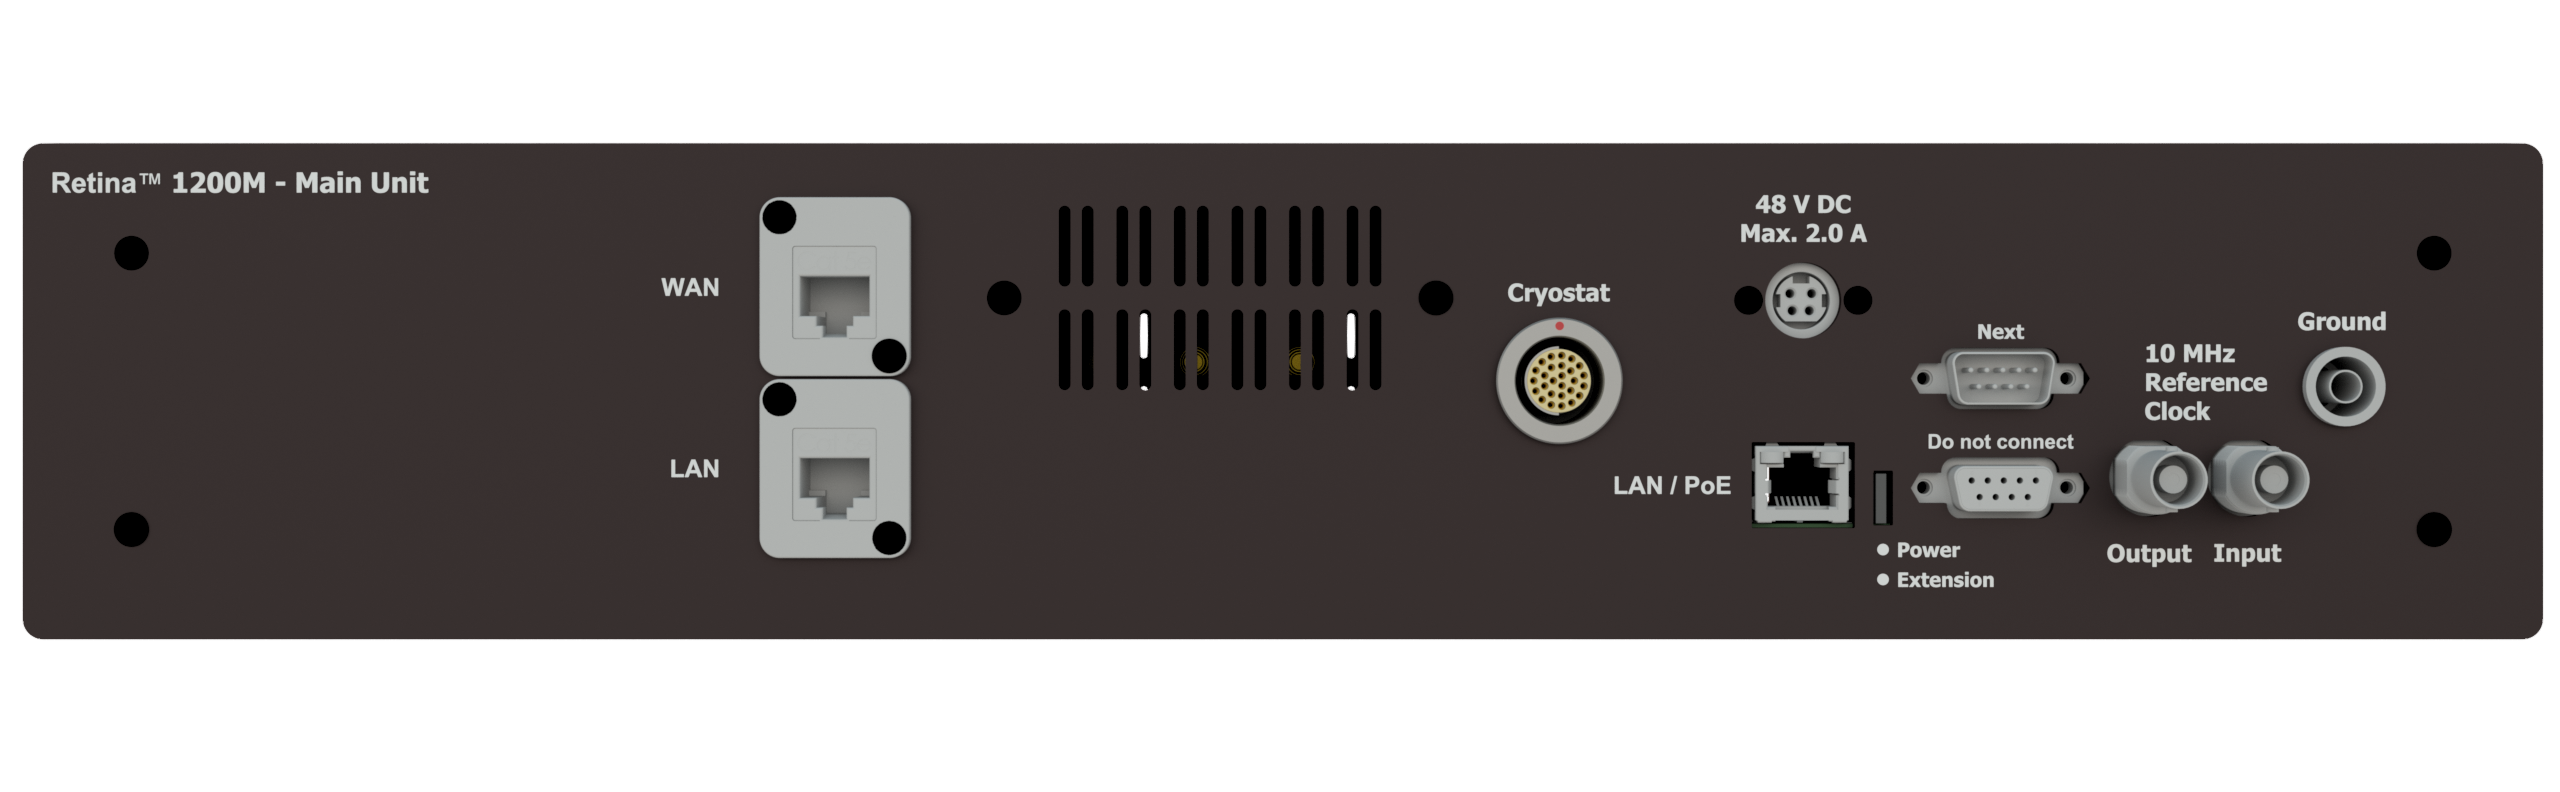
Back panel of the Retina main unit.
In order to set up Retina units, please follow the below steps.
Connect the gray Fischer cable between the cryostat and main driver, paying attention to the red orientation marking. A positive “click” should be heard when each end is inserted fully.
Connect the SMA cables between the cryostat and front of the driver. All SMA connections should be tightened with an SMA torque wrench at 8 inch-lbs (0.9 NM).
Connect the ethernet cables and other cables according to the number of units you are connecting. See Sections below for details.
Connect the power cable.
Setup of single unit
To set up a single Retina driver, connect the shorter ethernet cable between the two LAN ports on the rear of the driver. Then, connect the longer cable between the WAN port and your computer or network. An ethernet to USB converter can be used if needed.
Setup of multiple units
One of the primary advantages of the Retina driver is its scalability, allowing the Main unit to operate with multiple Extension units. Data synchronization across all units is achieved through a series of dedicated ports and cables.
Before proceeding further, connect ground cable with banana plugs to the Main and Extension units. To establish a connection between multiple Retina units, connect the Main unit’s Reference Clock Output port to the Reference Clock Input port on the first Extension unit. For setups with multiple Extension units, link the Main unit’s clock output to the input of the first Extension unit, then connect the clock output of each successive Extension unit to the clock input of the next in sequence.
Similarly, the D-sub connections follow a “daisy-chain” arrangement. Connect the D-sub “Next” port on the Main unit to the D-sub “Previous” port on the first Extension unit, then link the Next port of each Extension unit to the Previous port of the following unit.
The Main unit has three network ports, while Extension units are equipped with one. To ensure network connectivity, connect the Main unit’s LAN port to a network switch, and connect each Retina box’s MCU port to the same switch.
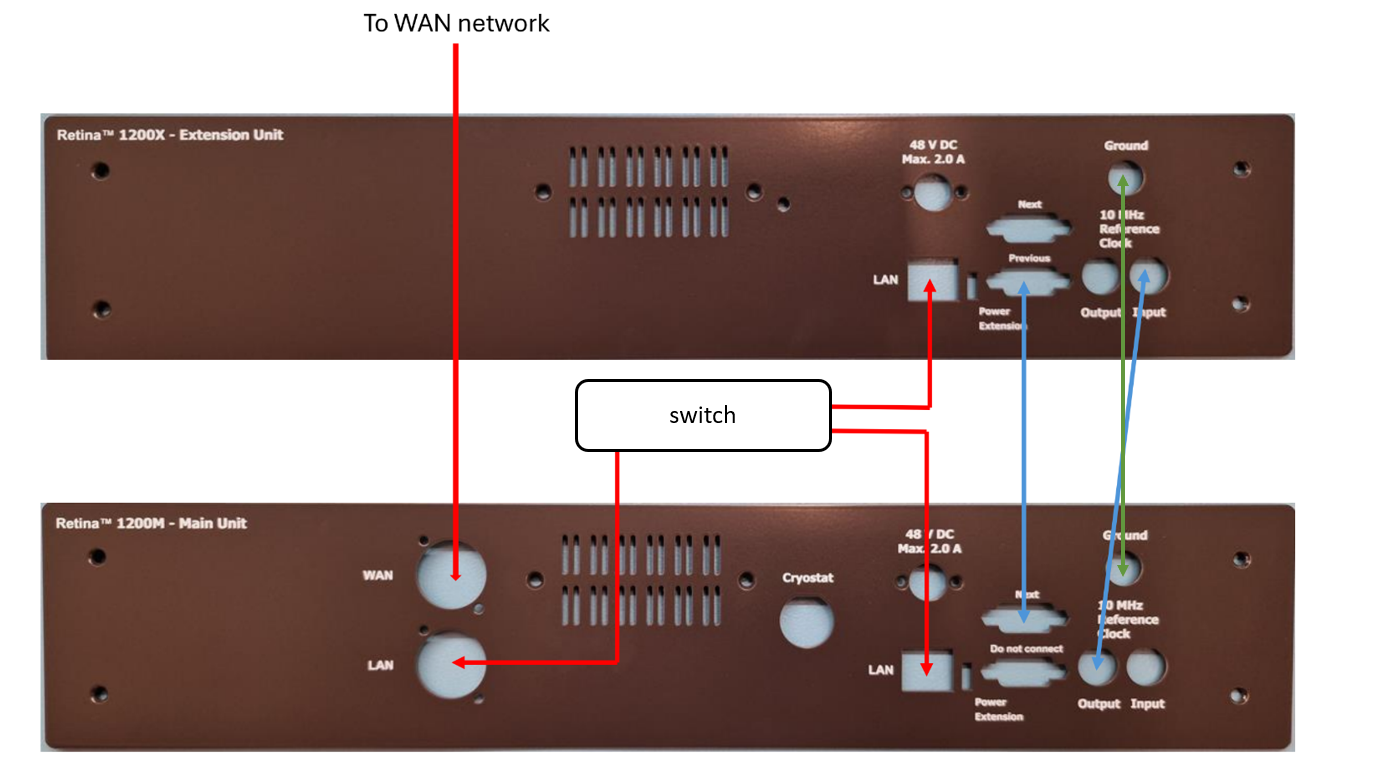
Connection scheme for multiple Retina units. The main unit is at the bottom of the image, and the extension unit at the top.
Connection to the Retina
In order to establish a direct connection to the Retina from a computer with Windows, follow the instructions below. You will need admin privileges on your PC.
From the Start Menu, open the “View network connections” control panel !Retina Network Connections
Connect your PC to the Retina via the ethernet cable from the Retina’s WAN port. Take note of which Ethernet connection is added when the cable is connected - this is the connection to the driver
Right click on this connection and select “Properties” !Retina Network Properties
Double click on “Internet Protocol Version 4” !Retina IPv4
Select “Use the following IP address:” and define the IP address as 192.168.7.4 and Subnet mask as 255.255.255.0 as shown below. !Retina IP Settings
Press “OK” and apply the changes
Type 192.168.7.3 into the address bar of your browser. The interface for the Retina driver should be shown
You can now configure the Network Settings of the driver from the Settings tab, as shown in Figure
!Retina Network Settings